FAQ Frequently Asked Questions
Please follow these instructions to request a quote:
- Email cspsales@customsafetyproducts.com. Please include a description stating what kind of material (Safety Pad II FR, Safety Pad III FR HP, CS150 for Pipe Rack Mats, etc) and for what part of the rig floor it will be used. We also require a CAD drawing or a simple hand drawn sketch with all dimensions.
- We will send a confirmation email upon receipt and let you know if we require any immediate information. If not, we will create a CAD drawing based on your measurements.
- Should there by any issues with the measurements, they will need to be worked out before a quote can be provided.
- Once a drawing is verified, or if there are no questions on the drawing, we will send a quote via email along with our CAD drawing for approval. A signed, approved drawing is required to proceed with an order.
- Additional questions and details can be discussed at this time.
When you are ready to place your order, please provide a valid purchase order along with a signed, approved drawing. You will receive an email confirmation of your order with a promised ready date.
We custom mold every order to your specifications and measurements; therefore we need your exact dimensions.
Dimensions and openings on rotary tables vary greatly from manufacturer to manufacturer. To assist you in measuring, we have provided drawings to guide you. Click on the type of rotary below. A new window will open displaying the rotary as well as the standard measurements for each size of that rotary. If your rotary is not a standard size, print out the drawing and fill in all necessary dimensions. Once completed, email us the drawing and we will work up a price quote for you. If you have any questions, please give us a call at 281-482-8668, and we would be happy to help you.
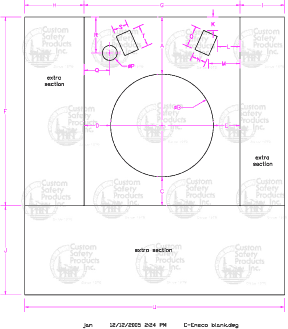

Raised rotary table.

Flush rotary table.
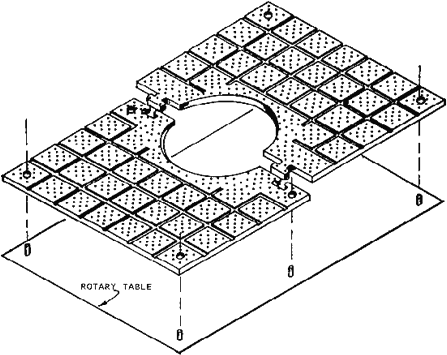
- Ensure surface is free of dirt or debris and mount or place pads in accordance with package layout. Consult your mechanical engineering department for any necessary approvals.
- Once pads are placed ensure that all pieces are flush with one another and proper alignments of all pieces are correct. The pads should lay flat.
- Mark surface through holes molded into the pads.
- Remove pad and weld guide pins to the spots marked from above procedure.
- Allow pins and surrounding metal to cool before laying pads over the guide pins.
A clean surface is the optimum surface. When it becomes necessary to clean the safety pads, any of the following methods can be used:
- Steam, if available.
- Strong detergent with scrub brushes.
- Non-flammable solvent which will cut oil and grease.
When necessary (normally once a year), contact Custom Safety Products for a non-skid resurfacing kit. A Complete Kit contains instructions, non-skid material, primer, mixer blade, hopper and hopper gun. A Regular Kit contains the same items as the Complete Kit, without the hopper and hopper gun. Contact Custom Safety Products for price and availability. No other product should be used to resurface a Custom Safety Products pad.

- Remove pads from rig floor during rig move or when time allows. Check guide pins for cracks and replace if necessary.
- Clean pads per instructions above.
- Roughen surface lightly with wire brushes or wire brush attachment on a grinder. IMPORTANT
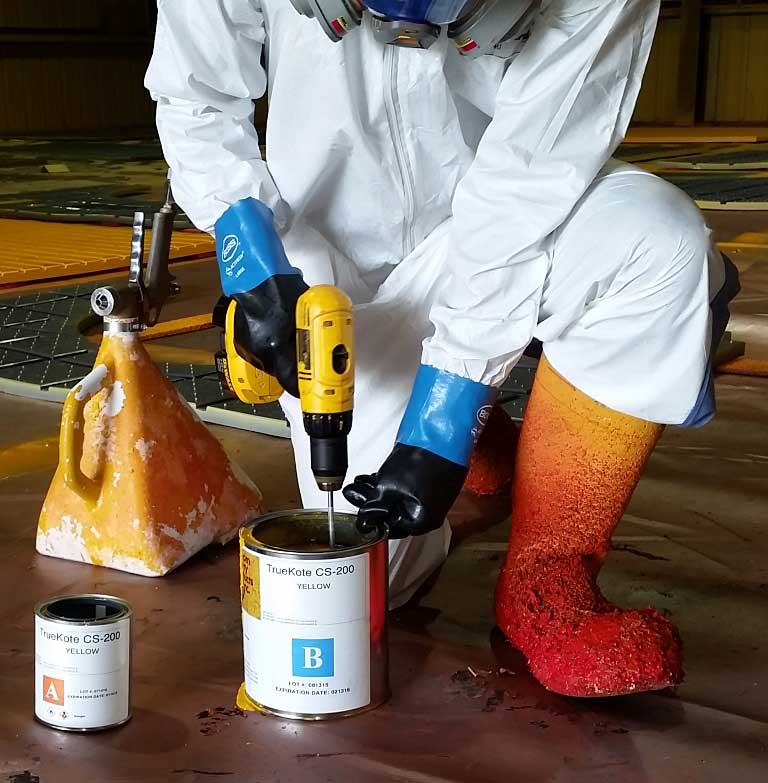
- Mix Primer 450, Parts A & B.
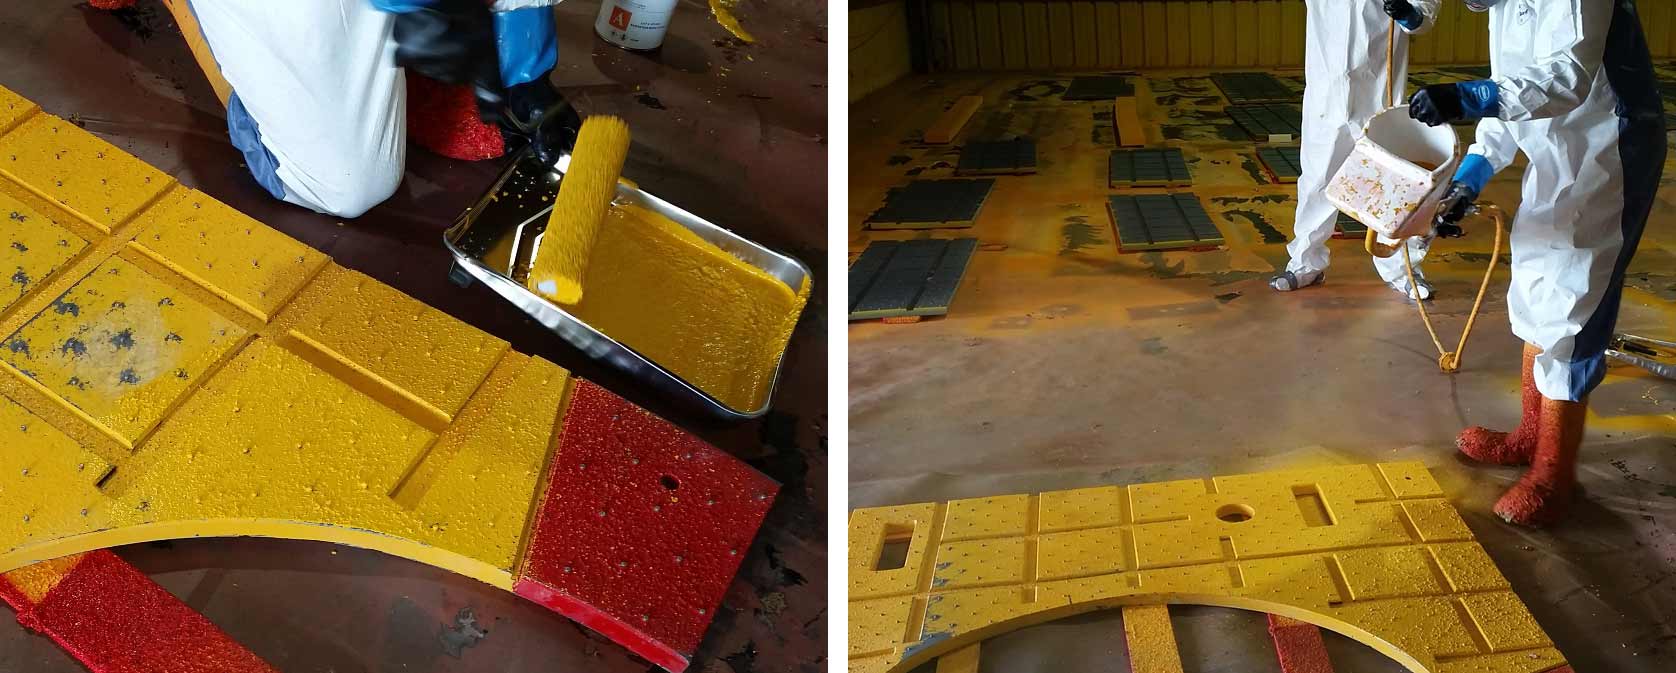
- Apply evenly with a short-nap roller or a conventional spray gun.
- Allow to dry 45 minutes.
- Mix CS-200 non-skid parts A & B with mixer blade in 1/4" or 3/8" drill motor, as per instructions on the quart can labelled Component "A."
- Apply evenly with a short-nap roller (included in kit) or hopper gun (available for purchase) and let cure overnight.
- Place back on rotary table.